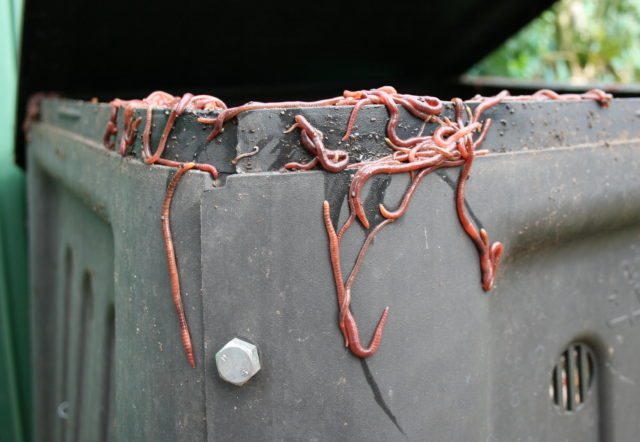
Composting is nature’s recycling system and you should get on board with it. Here’s why:
According to some stats from Boulder County, almost 20 percent of the county’s waste stream is plant trimmings and fruit and vegetable scraps, all of which could be recycled as compost. Composting creates high-quality soil amendment (nutrient-rich material that can be added to soil) and it reduces landfill methane. Methane, for the record, has roughly 80 times more heat-trapping power than its better-known greenhouse gas counterpart carbon dioxide. Landfills produce methane because the buried waste doesn’t receive oxygen so it undergoes anaerobic decomposition. Compost, however, undergoes aerobic decomposition and produces carbon dioxide instead of methane. Yeah, yeah… CO2 sucks, but the Environmental Protection Agency and the U.S. Composting Council both conclude that emissions from aerobic composting are considered part of the natural carbon cycle and do not contribute to CO2 emissions.
Chances are some of you have already tried composting at home. If so, you know it stinks. Like, it really reeks. It’s best if you have the space to keep a composting bin outside on a patio or in a garage, or even better yet, an entire backyard where you can create a compost pile. You put this pile of rotting veggie scraps and yard stuff away from anywhere you want to hangout or eat, basically.
You’ve got to turn compost regularly, and you can’t avoid it because it stinks; it’ll smell even more when you do finally get around to aerating it. Unfortunately, this method of composting is not always practical for many of us living in apartments.
But hope is not lost, apartment-dwelling eco-warriors. Vermiculture — aka worm composting, aka harvesting worm poop — can make all of your small-space, low-stink composting dreams come true.
Here’s a little how-to on setting up a worm composting system, and some resources that will help get you going.
Supplies
You’re not going to need a lot:
• Bin — Plastic or wooden with a tight-fitting lid and air holes
• Bedding — Shredded newspaper is a good start (now you know what to do when you’re finished with that Boulder Weekly), but you’ll also want some coconut coir (more on that later).
• Potting soil and/or compost — You need some to get the compost party started.
• Worms — Eisenia fetida, or, less esoterically, red wiggler worms
• Worm food — Chopped up fruit and vegetable scraps, banana peels, corn cobs, coffee grounds and filters, tea bags, eggshells, used paper towels and bread (even if it’s moldy).
• Do not add meat, bones, dairy, dog or cat poop, excessive citrus rinds (should be about one-fifth of the total scraps), twigs or branches or fatty foods.

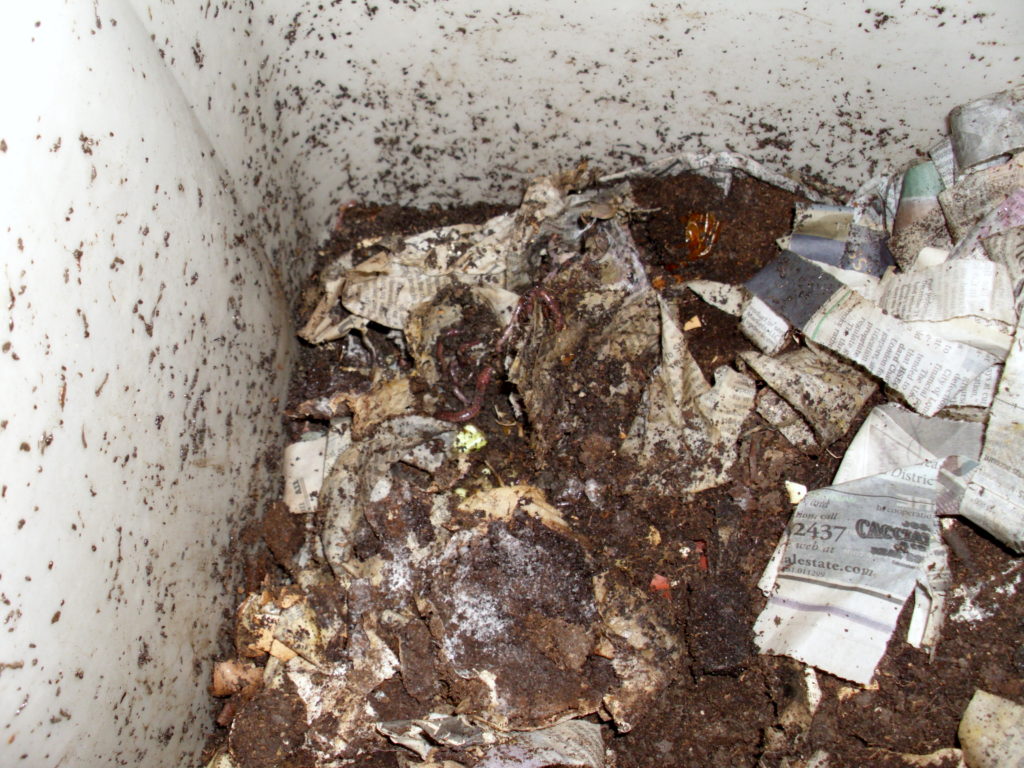
Right: The inside of a plastic worm composting bin. The worm castings are visible on the sides. Wikimedia Commons/Rowan Adams
About that bin
You can purchase a bin specifically for worm composting, either online or, like the local-business supporter you are, from a local hardware store. (McGuckins has them for around $100.) Many of these will be multi-tray setups. Worms will migrate upward into new trays allowing you to harvest their castings (read: poop) from the lower trays.
You can also make your own bin out of untreated wood or a plastic container. Red wigglers like shallow, dark bins, somewhere around a foot to 2 feet deep, depending on how large your family is. (Larger families need larger containers.) Wooden bins breathe easily and absorb moisture, but they’ll eventually start to rot. If you go the plastic route, purchase a container with a tight fitting lid, no more than 12 inches deep. Since plastic doesn’t breathe, drill quarter-inch holes in the lid and around the top edges of the bin.
You can create your own multi-tired bin (here’s some help: www.instructables.com/id/Multi-Layer-Vermiculture-Bin/) or you can create a single-level bin. You can still harvest the castings, it’ll just take a little more effort, but more on that later.
Vermiculture — aka worm composting, aka harvesting worm poop — can make all of your small-space, low-stink composting dreams come true.
Bedding
Take that Boulder Weekly you’ve been saving and cut it into streamer-style strips and then use a spray bottle to moisten the strips until they feel damp, but not wet. Place the damp bedding into the bin with a few handfuls of soil or compost to get the party started. You should use about the whole paper, somewhere in the neighborhood of 50 pages.
Do not use glossy paper.
I’d strongly recommend purchasing coir, also called coconut fiber, and mixing it in with the newspaper strips. Coir holds water while remaining breathable. It adds up to less maintenance of the worm composting bin, and a better environment for the worms.
Liz at Big Text Worms sends worms through the mail with some of her handmade bedding that includes coconut coir and peat moss. Added bonus: she sends instructions. And she’s really good at this.
www.redwormcomposting.com/the-share-board/big-tex-worms
Chop the veggies and the rest of the worm-safe stuff you want to add to the compost into small bits and then mix the scrap into the bedding. Worms will eat smaller foods more quickly, and the mixing ensures worms can get to the food. It also cuts down on fruit flies.

Just add worms
You’re going to need some worms to add to that bin. Here are some local(ish) laces to buy worms:
• The Flower Bin, Longmont (www.theflowerbin.net)
• A.B.C. Composting, Denver (www.abccomposting.com)
• Paulino Gardens, Denver (www.paulinogardens.com)
• Rocky Mountain Worm Company, Colorado Springs (rockymountainwormcompany.com)
• High Yield Organics, Colorado Springs (highyieldorganics.net)
There are about 1,000 worms in a pound of worms (a fact I never thought I’d know), and 1,000 worms can live it up real nicely in a 10-gallon bucket. To put it in other terms, you need a square foot of surface area for every pound of worms. Their container need be no deeper than 2 feet, because the worms won’t burrow any further down than that.
Now just add the worms to the bedding you’ve made. They’ll wriggle their way down and get comfortable.
Feed those worms
Warning: These suckers can eat! That pound of worms can consume about a half a pound of food scraps a day, so be prepared. Always chop the veggies into small bits. Depending on the size of your bin, feed the worms once a week to every two days with about a cup of scraps. Keep track of how fast the worms are eating so you can adjust timings, amounts and varieties. If the bin stinks, you’re probably overfeeding. Tuck scraps 3 to 4 inches deep to ward off fruit flies, and rotate the bin to ensure even composting.
Location, location
A 5-gallon bucket (good home for about a half a pound of worms) will fit nicely under most kitchen sinks, which is a perfect place for your worm bin. Your wiggly friends like it dark and cool, between 55 and 75 degrees Fahrenheit. A basement, cellar or a garage will work too. I suggest taking measurements of under-the-sink space before heading out to buy materials to create your bin. Make sure you have the space you need/materials that will fit the space you have.
Harvesting
There are several ways to harvest your compost:
• Pyramid method: Spread a plastic tarp out in the sunshine. Make a pyramid from your pile-o-worms and allow a few minutes for the worms to burrow deeper. Harvest compost from top of the pyramid.
• Screening method: Get a screen made for masonry work. Move gently to separate fine compost from big chunks of food and worms.
• Migration method: This is basically how the multi-tray systems work. Provide fresh food to cause the migration of earthworms from the old pile to the new food source. The old pile is your compost.
For more tips on harvesting visit: www.cropsreview.com/harvesting-vermicompost.html
Troubleshooting
If you create healthy bedding for your worms, feed them well and keep them adequately damp, they’ll never try to leave the container; everything outside of the container is Death Valley for worms.
That doesn’t mean that despite your best efforts something won’t go wrong. If their habitat is less than ideal, worms may try to escape… or they may die.
• Sprinkle/spray water on the bedding every other day. The bedding should feel like a wrung out sponge.
• The bedding also can’t be too wet. Add shredded newspaper, cardboard or coconut coir about once a month or as needed. This helps to balance the moisture. You’ll notice that the material in the bin will disappear quickly — replenish it.
• A light in the area where your bin is located can also keep worms from trying to escape.
• Speaking of escaping, the bedding could be too acidic (remember how you can’t add too much citrus?). Roast and then grind some eggshells to counterbalance the acidity.


