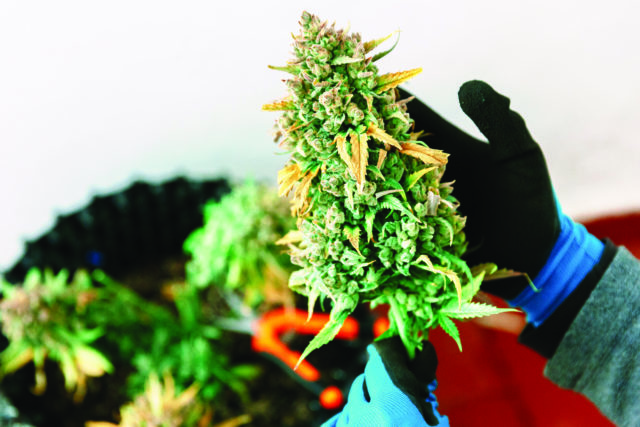
These days, it’s so simple to go into a dispensary and buy high-quality, tri-chrome-frosted cannabis that it’s easy to forget that you can grow your own weed at home. Sure, it takes far more care and patience, but with a simple setup and the right kind of green thumb, growing cannabis at home can be a very rewarding project.
There’s a lot of nuance that goes into growing pot, though. You can’t just jam a few seeds into a pot of dirt and expect a fruitful cannabis plant to sprout up (well, you can—but you’ll probably end up with some malnourished schwag, instead). Home grows take planning and precisely controlled environments to pull off successfully.
Chris Baca is intimately familiar with all that. Before becoming the cultivation operations manager for The Clinic’s flagship grow in Denver, he was a home-grower himself. (And not necessarily just as a hobbyist, he says.)
Baca was the obvious expert to consult for a guide on how to up-level your home grow. So we called him to talk about the craft he’s spent his career perfecting.
Where to start?
When beginning a home grow, there is a choice that every cultivator must make: To start with seeds? Or to start with clones?
“I’ve seen a lot of people struggle with seeds,” Baca says. “Just getting them to fully germinate and actually get some good roots on them [can be difficult].”
Baca suggests planting the seeds and creating a “dome-system” using a dixie cup with holes punched in its bottom, turned upside down over the seed. That creates a greenhouse effect that will help the seeds put deeper roots down and sprout faster and healthier, Baca says.
By contrast, clones cut those first few steps out entirely.
“Clones are already a living plant, so it’s easier to work with from the start,” Baca says. He mentions a few brands of machines like Oasis, EZ Clone and Turbo Clone—devices that allow cultivators to grow clones in small square slots without soil. “And they’re actually good for tomatoes and other plants, too,” Baca adds.
Putting down roots
The flower of a cannabis plant is only as good as the soil it grows in. That’s why Baca recommends mixing your own soil and avoiding the commercial premixed bags.
“One of the best ways you’re going to be able to [grow good cannabis] is organically composting soil. You can mix some basic soil with a cocoa medium or any kind of medium, and that’ll give you a good live soil. Then add some worm castings in there, a little bit of fish and kelp and other little additives … that will build a better environment for your plants” he says. “That would be better than doing it with actual store-bought soil.”
Either way, Baca says, when you’re finished harvesting your plants (we’ll get there) don’t immediately throw that soil away.
“If you had no pests and everything was in control, you can reuse that soil again,” he says. “I would do it at least once, sometimes twice, depending on the situation.”
Setting up a set-up
An enclosed space is better than growing in the open air. Not just because it better protects the plants from pests and infections, but because it’s far easier to control the environment, and it contains a lot of the mess, according to Baca.
“Just the overall fact of having an enclosed area is beneficial,” Baca says. “It’s all easily closed, so there’s no worry about lights and timing.”
It’s also very discreet, he adds. Which matters less now that cannabis is legal in Colorado, but still makes a difference when you have guests over. Most modern home-grow tents are unobtrusive enough to fit inside a small closet, behind a couch, or even in the corner of a living room.
Lights
Baca says LED light systems are the only way to go, for any home-grower paying their own electric bill. Not only do LEDs use less energy, they last longer than metal halide bulbs (reducing waste), and they also produce less heat, making vertical gardening a possibility for those with high ceilings, and reducing the need for powerful fans or HVAC systems.
Most LED gardening lights also include dimmers that can be adjusted throughout the life of the plant to mimic different phases of natural light. Baca says he usually starts his baby plants off with low light and slowly ramps it up as the plants get bigger.
“Just like a small child. You don’t want to give them a steak right away. You start with baby foods and then add small solids and then bigger foods.”
Growing Up
Dry salts are commonly used for soil nutrients because they are the cheapest form of plant fertilizer. But organic fertilizers and water-soluble fertilizers are better for the plant and better for the environment, Baca says.
Really though, it all comes down to building your soil’s “NPKs” (aka nitrogen, phosphorus and potassium). Those elements are what you’re trying to boost in the soil to feed your plants—but be careful not to go overboard. Cultivators need to “follow good feed charts and keep those [NPKs] in control,” Baca says.
Keeping a close eye on the Ph and EC (electrical conductivity) of the plants’ soil is also essential. Good feed charts will provide guidance on this as well, but Baca usually aims for a Ph of 6 and an EC of anywhere from 1.2-2.0 depending on the stage of the plants’ growth. Ph and EC meters are available on Amazon or in your local garden store.
Between six and seven weeks into growth, the plants have to be “moved” from the vegetative phase into flowering phase. At The Clinic’s commercial grow, that means physically picking up the plants and putting them in a different room. At home it just entails switching the light schedule from 18-hours on and six-hours off for veg, to 12-hours on and 12-hours off for flower.
“You have to deal with how big your plants are getting, too,” Baca says. “If it’s a strain that grows relatively quickly, you typically don’t want to let it grow too much in the veg phase because then at the flower phase, depending on the strain, it could grow another foot in size. I’ve seen some plants almost double in size.”
And of course, he adds, double and triple check your light timers (because technology fails) and consistently monitor the humidity and other environmentals of your grow space.
Harvest/dry/trim
Between three and five months (depending on the strain and environmental factors), you’ll have fully grown plants, with big healthy stalks, fat green leaves and glorious nugs flowering at the top.
Watch closely for the leaves to start turning yellow and curling in. When the nugs look plump and delicious and don’t seem to be growing any more, harvest time has arrived, Baca says.
Cut the plant at its base and trim the big leaves first (to promote airflow for drying) and then trim away the smaller leaf matter either before drying or during. Once the stalks are trimmed, they’re ready for curing; hang them upside down in a temperate, dry, preferably dark room using strings like laundry wires and let them hang out for five to seven days, until the buds’ humidity is down to 60-65% (which you can check using a humidity meter). Then, Baca says, it’s ready.
Cut the stalks away from the bud, fill your home jars with your homegrown, pack a fresh bowl of the good stuff and light up. You’ve earned it.
“Just be patient,” Baca says. “Just have fun and appreciate the plant.”


